One of the most elegant types of art, heroines’ drawing is simply an infusion of fashion design with creativity. Hence, for anyone aspiring to become a designer or indulging in it as a hobby, learning how to illustrate fashions perfectly can be of great importance. Fashion illustrations turn our concepts into real images on paper ranging from graceful gowns to relaxed clothes or even futuristic ideas. This manual shall let you into some facts and therefore offer you a simple step-by-step guideline on how to enhance your fashion illustrating talents.
Fashion illustration is an artistic endeavor that involves drawing and illustrating fashion designs in order to show clothing ideas visually. It is employed by designers in the process of translating their concepts during the design process. Traditionally, designers relied heavily on sketches to showcase their collections to clients and buyers since digital tools and photography had not yet taken over the fashion industry. However, fashion illustration still remains critical for creativity expression for fashion designers as they play with styles, colors and fabrics.
Step 1: Gather Essential Materials
It is necessary to have the correct tools before starting your journey into fashion illustration. Expensive apparatus God is not needed but having a few basics will help the process run smoothly:
Sketchbook: A thick papered one, supporting various drawing mediums.
Pencils: A variety of pencils from 2B to 6B used for light sketches to darker tones.
Fine Line Pens: They are used to add intricate lines and contouring your design.
Markers and Colored Pencils: These are used in coloring and shading ways illustrations.
Ruler and Eraser: They assist with proportions as well as correct any mistakes.
Step 2: Grasp Anatomy Basics
Fashion illustration is about drawing human figures in stylized ways. Therefore, it is important to understand basic human anatomy before beginning. Nonetheless, fashion figures are not drawn to scale like actual humans. Fashion illustrations frequently feature elongated human figures which measure approximately (8-10 heads tall). This makes them sharper and thinner appearing; hence they make clothes appear better by allowing them hang loosely on the body.
Practice drawing:
Torso – Concentrate on proportions by dividing it into three main parts that are head, trunk or body plus legs.
Limbs- Consider how arms flow along with legs including poses and movements as you empathize vitality and movement inside of your design.
Hands & Feet – conquered are hardest however they add depth as well as professionalism into your drawing skills.
First we shall draw some basic poses for fashion.
The following step is to create poses that will bring out the clothing design. This poses are dynamic and stylized in fashion world and often emphasize specific parts of the clothing. Some common clothing poses include:
Walking Pose: One leg in front, arms going back and forth naturally.
Standing Pose: The figure is either standing straight or leaning slightly so as to have different views of the design.
Profile Pose: The figure is standing sideways for some unique elements like a coat or long dress can be highlighted.
In order capture these flows quickly, it is good to practice gesture drawing. Do not mind about details at first; just follow the movement. Second — with various angles, gesticule associated with fashion model becomes possible for correct expressions due all people’s habits at once.
Step 3: The Commencement of Fashion Design
When you are comfortable with sketching forms, you may go ahead and direct your attentions to fashion design. Start small such as skirts, blouses or pants before you move to more complicated pieces like evening dresses, jackets or layered clothes.
Here’s how to approach the design process:
Draping: Consider how fabric falls when worn on the body. Practice drawing folds, pleats and different textures in order to get better at this.
Proportion: Pay attention to how clothes fit and conform to a human body. For instance, high rise jeans elongate legs.
Details: More so, embellish with details such as buttons, zippers or lace patterns. These finer points can bring out distinctiveness in your designs.
Step 4: Incorporate Colors and Textures
Your fashion illustration will come alive with color. The colors, textures and patterns you choose can really affect the look of your designs. You can use colored pencils, markers or watercolors as an experimentation tool to produce various appearances. Key techniques include:
Shading: This involves making dark areas in some places where the light is absent
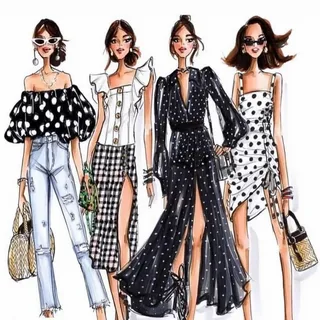
Patterns: This will also enable you to explore other creative avenues such as prints like polka dots, stripes and flowers.
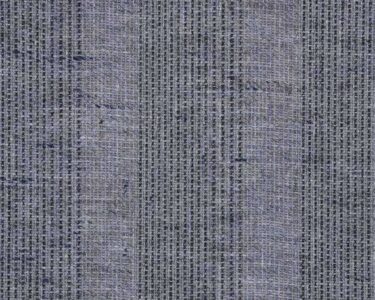
Texture: Realistic designs will have them effectively represented in different fabrics such as silk, denim or velvet.
Step 5: Improve and Complete Your Illustration
You have already done the basic sketch and added colors, now you need to refine your illustration: Outline: Use thin lines to go over the figure and clothes in order to make your design stand out. Details: Look at what you have done so far and fill in any details that may be missing such as jewelry, buttons or stitching. Finalizing Touches: Remove any erratic pencil lines and ensure that your artwork appears neat and polished.
Fashion illustration is an essential asset for anyone who is embarking on a journey into fashion design.
It might be a bit scary at first but with the step by step guide beginners can improve their abilities and learn how to sketch, pose and create garments. Keep in mind that it takes practice to be good at anything so don’t worry if your style doesn’t come right away; it will come as you keep going and experimenting until you discover something that represents your individual point of view.